If you have multiple monitors and you work with photoshop, you will notice that sometimes when you click an icon, the pop up box opens up where you can't see it...off your screen. I found a great video that demonstrates how to get that pop-up back on the screen!
https://www.youtube.com/watch?v=iMt68khvd_4
Thursday, July 27, 2017
Friday, July 21, 2017
Using the Pen Tool In Photoshop to Draw a Clean Dashed Curvy Line
Wait...there's a pen tool in Photoshop? Which icon is that?

This video on YouTube shows how to draw a dashed line in Photoshop: https://www.youtube.com/watch?v=rr5WTYShltI
I have Photoshop CS6 and the directions worked. I'm really not good, yet, at using the pen tool but it is the best way that I (now) know to draw a curvy line that doesn't look like a 1-year-old drew it.
Here is the image I used it on today for the library website:

P.S. I had to look up if "drew" is the correct past tense of "draw" because it didn't sound right in my head. Turns out that it is correct. https://www.quora.com/Which-is-the-correct-past-tense-of-draw-drew-or-drawn-and-why
Thursday, July 20, 2017
Add Google Analytics to OJS (Smarty Templates)
The Open Journal Systems (OJS) https://openjournalsystems.com/ is constructed with Smarty Templates https://www.smarty.net/.
Google Analytics instructs you to paste the tracking script directly before the </head> tag. The </head> tag for ALL OJS pages is located in the ojs/lib/pkp/templates/common/header.tpl page.
So I tried this and it didn't work. This is because the Smarty tempalte engine attempts to translate and interpret some keywords in Google Analytics script that conflicts with the Smarty template delimiter syntax.
The fix is to put {literal} and {/literal} tags around your block of code, which allows it to be taken literally.
So, this is what it looks like:
{literal}
<script>
(function(i,s,o,g,r,a,m){i['GoogleAnalyticsObject']=r;i[r]=i[r]||function(){
(i[r].q=i[r].q||[]).push(arguments)},i[r].l=1*new Date();a=s.createElement(o),
m=s.getElementsByTagName(o)[0];a.async=1;a.src=g;m.parentNode.insertBefore(a,m)
})(window,document,'script','https://www.google-analytics.com/analytics.js','ga');
ga('create', 'XXXXXXX', 'auto');
ga('send', 'pageview');
</script>
{/literal}
Obviously you would want to replace the XXXXXXX with your actual google analytics tracking code. 😁
Word and Windows Permissions Requirements for ILLiad
If you ever can't do something in ILLiad (permissions error) - it may be because you do not have the right settings for MS Office Word or Windows.
To enable the ILLiad template macros, check these
settings in MS Office Word:
- Open MS Office Word.
- Select "Options" located towards the bottom of the left-hand menu
- Select "Trust Center" located at the bottom of the left-hand menu
- Select "Trust Center Settings" located at the bottom far right.
- Select Macro Settings on the left side.
- Then click on the "Enable Macros" bottom.
- Choose OK.
- Choose OK again.
- In Microsoft Word (or Excel), select the "File" tab located at the top left-hand side
- Select "Options" located towards the bottom of the left-hand menu
- Select "Trust Center" located at the bottom of the left-hand menu
- Select "Trust Center Setting" located at the bottom far right
- Select "Protected View" located at the bottom of the left-hand menu
- Uncheck the following three option located under
"Protected View.
- Enable Protected View for files originating from the Internet
- Enable Protected View for files located in potentially unsafe locations
- Enable Protected View for Outlook attachments - Select OK
- Select OK again
Also, when you are using Office 2013, and above, you need
to do this:
Word 2013 has a new feature call reading view, and it
uses this view for any uneditable files. Word will open the template documents
as "Read Only," Word initially
displays the document in this view which has the unfortunate side effect of
disabling mail merge operations. To work around the issue:
- Open the options in Word
- On the General tab, there is a section for Startup options which includes a setting with "Open e-mail attachments and other uneditable files in reading view." Make sure that is unchecked, and it will correct the issue.
- Save the changes and close Microsoft Word.
Windows Permissions you need:
If you are using Windows 7, 64-bit, it is at c:\program
files (x86)\illiad\ by default. Any
other previous version of Windows, it will be at c:\program files\illiad\ by
default. For you to access your
directory correctly, you need to make sure your permissions are correct.
With Windows 7 x 64, you need to add Permissions for each
user's Windows logon to the security settings for the ILLiad folder in the
c:\program files (x86)\illiad\. With
Windows 7 x 32, you work with the c:\program files\ILLiad\ folder.
- First, you right-click on the ILLiad folder and choose properties.
- Go to the Security tab and in the top section, choose Edit so you can edit the Users group
- Select the Users group and below mark the full permissions.
- Once you click OK, then you will be back to the Main ILLiad Permissions Window.
- Choose Ok to get out of the window.
Search Primo from ILLiad using Addon
If you want to be able to search Primo in the ILLiad client when processing a borrowing request, then you will need to install the Atlas ILLiad ExLibris Alma Primo Addon. Note that this addon works only with the classic user interface for Primo, not the new UI (as of 7/20/2017). TTU currently uses the new UI, but for this purpose we use the old UI.
Follow these steps to install the Addon:
Follow these steps to install the Addon:
- Go to https://prometheus.atlas-sys.com/display/ILLiadAddons/ILLiad+ExLibris+Alma+Primo+Addon and download the zip file.
- Unzip the downloaded files and place them in C:/Program FIles (x86)/ILLiad/Addons/ExLibris Alma Primo folder.

- Open the ILLiad Client application.
- Click on the System tab.
- Click the Manage Addons button.
-
Click on the addon that has the name ExLibris_Alma_Primo and select the check box under the Active column to activate this Addon in the client.
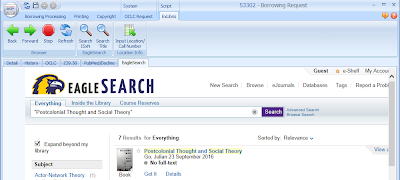
- In the lower-right part of the window you will need to check the checkbox that says AutoSearch. Do not check StartwithISxN or Popup. For your localurl the directions say to enter in the shortened URL. I started out by entering https://tntec-primo.hosted.exlibrisgroup.com, but this didn't work (I got an error message when using the Addon). So then I entered in the full URL of our Primo new UI https://tntec-primo.hosted.exlibrisgroup.com/primo-explore/search?vid=01TNTECH_default and although I didn't get an error message, the title didn't automatically populate in the search. So then I tried our classic UI longer URL http://tntec-primo.hosted.exlibrisgroup.com/primo_library/libweb/action/search.do?vid=01TNTECH_default and it works perfectly! Last, you will need to enter in some text in the AddonRibbonName box. I named mine EagleSearch because this is what we branded our Primo.
- Click the Save Settings button.
- Close the Manage Addons window.
- I am not sure if you have to but I completely closed out the client and opened it back up.
- Now, to test you will need to open the Client. On the Home tab, in the Main - Borrowing tab, you will need to double click on Awaiting Request Processing. Hopefully you have at least one request so that you can test.
- Double click on one of the borrowing requests.
- Click on the tab that you just created. Mine is called EagleSearch. The Addon should automatically search for the title.


Troubleshooting
If you are unable to save your Addon settings, then you will need to follow the directions in my next post on Word and Windows Permissions Requirements for ILLiad.
Subscribe to:
Posts (Atom)
Get the OpenURL of an Item in Primo New UI
I needed to view the OpenURL of an item in Primo New UI so that I could troubleshoot why one of our Alma General Electronic Services (ILLiad...